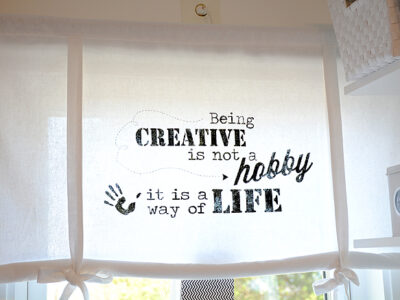
My contribution to Hobbyworld this week contains my first tutorial, as you can see here.. I have made a painting that resembles a chalkboard with text that looks to be written with white chalk. Now I am also officially a permanent member of the design team at Hobbyworld!! My picture is among the other members in the left part of the website.
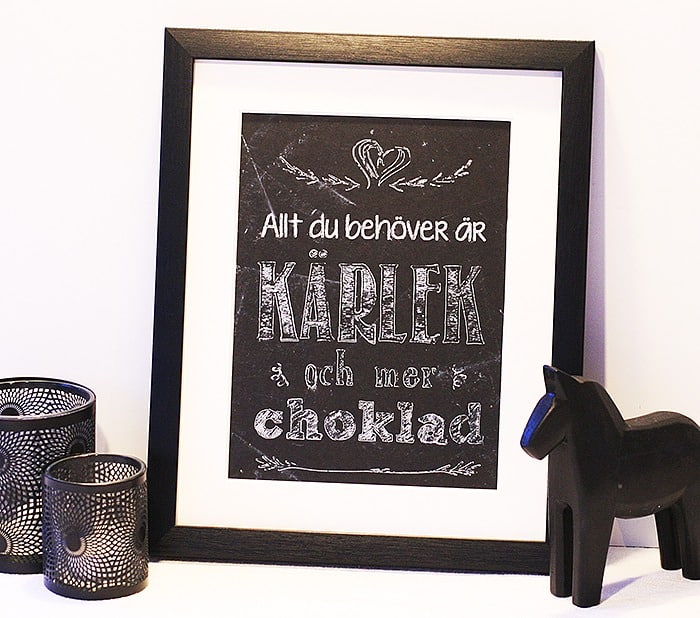
It is quite popular with chalkboards in the home decorating right now and for me this works just as well as a really blackboard with handwritten text. It would take me days, maybe weeks, to write this text by hand. The text fits perfectly now for Valentine’s Day, and works very well in our kitchen.
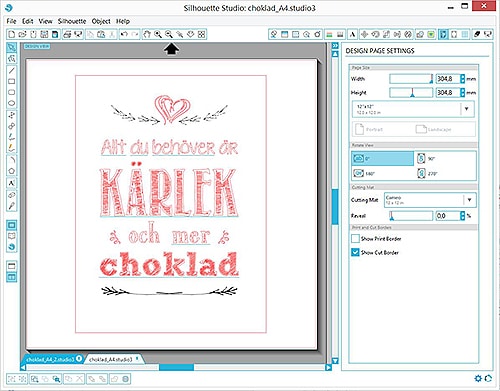
The painting is made using a white sketch pen and Silhouette Cameon.
This is how you to the painting
Start by doing a picture in Silhouette Studio how you want the painting to look like. You can choose to use a ready design, there is plenty to choose from in Silhouettes online store that works excellent, or you can write a text yourself. Make sure that the image fits in the frame you intend to use, easiest way is to make a rectangle in the document as large as the frame is.
NOTE!! When you do the design it is important to remember that when using a Sketch Pen the line that are printed is on the same places as an ordinary cutblade would cut out the text. For example if you are using a standard font as Arial, the sketch pen write the contour of the text, just where the blade would have cut out the text. In the same way it will be with the decorations you put into the design.
To get a sense of that the text on the painting is drawn with a crayon is a tip to use fonts that look sketched. To my painting, I have only used free fonts that can be found on internet and the font I have used are these:
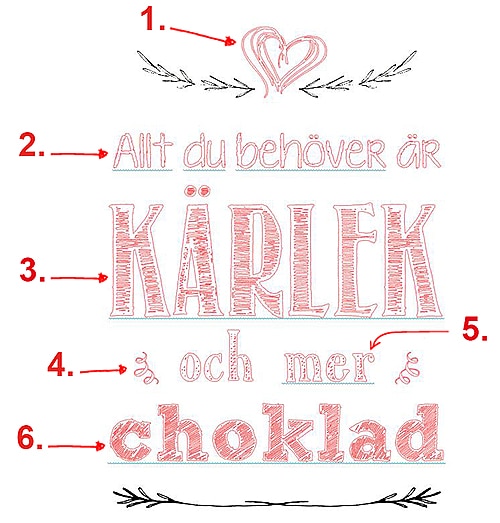
1. Go around the books – symbols. 2. KG Ten Thousand Reasons. 3. Return To Sender. 4. Bergamot Ornaments. 5. Austie bost roman holidaysketch. 6. Sketch Block
Tip: Some fonts do not contain å, ä and ö, the word KÄRLEK (eng. LOVE) had no Ä in the font Return to Sender. Then I wrote a big A in the word, made a new textobject and wrote two common dots and moved the text block so it became located above the A.
Decorations
Actually, it suffices well with a text but I’ve added some small decorations to. The heart in top center and the swirls next to ”och mer” (eng. and more) are found in the fonts that you can see in the list above (1 and 4).
The other decorations are free and available on internet.
Trace
If you insert own decorations that are not cut files, you must ensure that they can be used before you are ready. If the contours on any object is’t red when you click on Cut setting the part will not be printed (our cut out). Is there such objects, use the Trace to make the them writable.
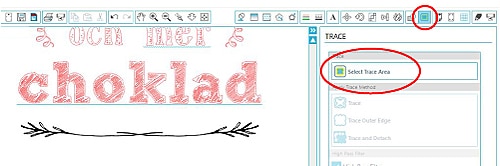
Click the Select Trace Area and drag a box around the object that is black.
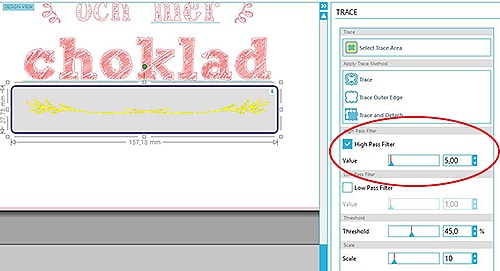
When you are making an object able to be cut out you usually increase the value of the High Pass Filter until the whole object is yellow, but in this case I have pulled down the value slightly.
Printing
Once your design is complete, it is time to print it.
Start by replacing the cutting blade to a white sketch pen. Use a smooth black cardstock or any other black paper with a smooth surface and enter in Silhouette Cameon.
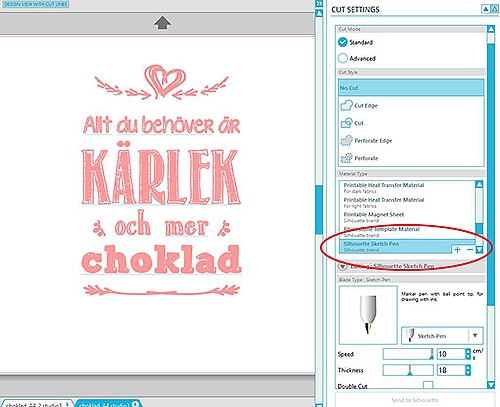
Click the Cut Settings and under Material Type Silhouette select Silhouette Sketch Pen.
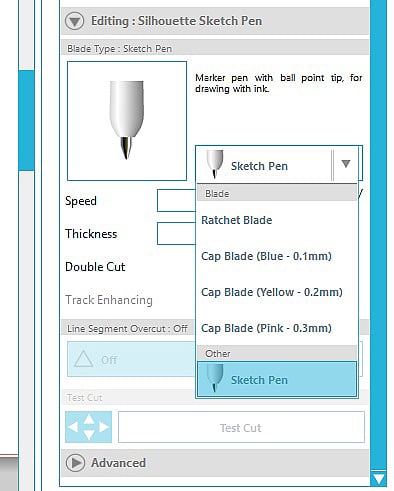
Check that Sketch Pen is selected in the next field, it would happen automatically but check to make sure. Click on Send to Silhouette and wait.
Final work
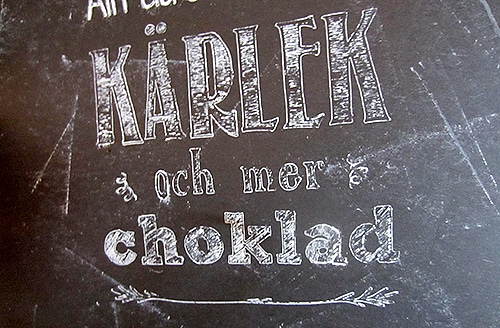
It may be that the pen is not printing all lines perfectly which may depend on which paper you use, the font and the size of the objects in the design. If you have a thin white pen, you can gently fill in where there are missing lines.
To get a sense of that chalkboard is used and has traces of white chalk left, I use a white ink pad and an acrylic block.

I’ll dip one of the acrylic blocks corner, the edge on the ink pad and stamp with it here and there and pulls it over the paper to get some white paint on it. Please test on a piece of waste black paper before you do it on your design.
Now just to cut the sheet in the size that fits in the frame and frame it and you are done!